Showing posts with label Whats To Eat. Show all posts

Saturday, April 26, 2014

What's to Eat?? Caprese Bites

Remember my other post(here) about how I was going to make juicy grape tomatoes, fresh mozzarella, fresh and awesome smelling basil, drizzled with balsamic, two ways? The first way was a pasta route, heartier, fuller, but this way is a caprese bite.  Perfect for when guests come over  or just when you want a quick and refreshing snack! The best part is that it is done in THREE, yes, 3 easy steps! And only has 5 ingredients! (HINT HINT Boys, sure way to impress your date without having to do that much work!)
What you will need::
  • Grape tomatoes, 1/2 cup cut in half or quartered
  • 1/2-1/3 cup of basil, cut in half or thirds
  • 1/2-1 cup mozzarella balls
  • Balsamic glaze to drizzle 
  • Toothpicks for decor and fun!

Start off by cutting your washing your basil and grape tomatoes and then cut your tomatoes.

Drizzle on some balsamic glaze over your mozzarella to your desired liking.

And now you can finish it off however you like! I like to start off first with the mozzarella, than adding a basil piece, and finishing it off with the grape tomato, with the cut side facing down(putting it on the toothpick last) so it stabilizes your bite. 

Is your mouth salivating right now? I'm about to devour all of this myself! Sorry guests!
Check back Monday for a floral and fun Mani Monday.
Enjoy the rest of your beautiful weekend!
ps, don't forget to =)

Sunday, March 30, 2014

What's to Eat?? Caprese Pasta Salad

Juicy grape tomatoes, fresh mozzarella, fresh and perfect aroma of basil, drizzled with some salt, pepper, and balsamic.  Whose mouth is salivating right now?! Mine sure is! This recipe is the perfect amount of straight up delicious and super easy to make!  You can serve it as a side dish, main dish, appetizer, or even just a mid-afternoon snack! Adding some pasta to it makes for a nice and hearty overall meal that will leave you perfectly full and satisfied! 
I am going to show you how to use most of the same ingredients, but made two different ways.  Today's will be the more heartier and fuller of the two, caprese pasta salad. Both are stupid simple to make and anyone can do it! Enjoy!

What you will need:: (for pasta)

  • 2 cups dried pasta ( I used shells), cooked as directed on package
  • 1 cup grape tomatoes, quartered or halved
  • 1 cup fresh mozzarella(1 ball), cubed
  • 1 cup fresh basil, sliced into thin ribbons
  • kosher salt and black pepper, to taste
Cook your desired pasta according to package directions.  Drain and rinse with cold water.  

Now add the cold pasta to a bowl along with your chopped tomatoes, mozzarella, and basil ribbons.  

Now you can add your dressing; I made a Balsamic Vinaigrette Dressing, listed below!

What you will need:: (balsamic vinaigrette dressing)
  • 1/4 cup balsamic vinegar
  • 1-2 tablespoons olive oil
  • 1 clove fresh garlic, diced really thin
In a small bowl, mix your super tiny and diced garlic and whisk in your balsamic.  Continue to whisk slowly while adding your  tablespoons of olive oil in a steady stream.  

You can now drizzle your balsamic vinaigrette dressing onto your caprese pasta mix along with seasoning your desired taste of salt and pepper.  Mix well and enjoy!

Check back later this week to find out how to make another caprese item, and check back tomorrow for Mani Monday!
Bon appetit!
ps, don't forget to =)

Thursday, December 19, 2013

What's to Eat?? Skinny Eggplant Rollatini

Let me guess what's on your mind, eggplant? Yuck! But I am telling you, try this recipe and your taste buds will thank you! At about 230 calories for 2 rollatinis, this decadent, cheesy Italian dish will soon be your go-to favorite way to enjoy this veggie comfort.  With the weather being so cold, this dish is a perfect reason to put on your apron and turn on your oven!
With the eggplant being sliced so thin, each bite will literally melt in your mouth.  And don't let the size get to you; each serving is very generous and you will be stuffed for under 250 calories.  Bon appetit!

What you will need::
2 medium eggplants, cut lengthwise into 7-10 slices
1 1/2 cups of marinara sauce of your liking
1/2 cup part skim ricotta cheese
1 cup(4 oz) of Mozzerella and Parmigiano Reggiano (or you can do any two cheeses of your liking)
4 cups spinach or 1 8oz frozen spinach
1-2 garlic cloves, minced
1/2 an onion, chopped
Kosher salt, italian seasoning, and black pepper, to taste

Go ahead and heat your oven at 400 degrees. Cut the 2 ends off the eggplants.  Now cut the eggplants lengthwise, into roughly 1/4-inch thick until you have about 7-10 slices all about the same size.  I used a mandolin which made this process the easiest. Sprinkle the eggplant with kosher salt to help remove the excess moisture and bitterness from the eggplants.  Keep it aside for about 10-15 minutes and then pat dry with a towel.
Season the eggplant with a little more salt and pepper, then arrange onto a parchment-lined baking sheet.  Bake the eggplant until it is TENDER AND PLIABLE but NOT fully cooked, for about 8-10 minutes. 

In a saucepan, go ahead and pour just enough oil to cook the onions and garlic(about a teaspoon worth). Add your onions and garlic and let it cook for a few minutes.  Then add your italian seasoning.

Now add your spinach and let it cook for a few minutes until it wilts.

In a medium bowl, mix the ricotta, parmingiano, and the mixture you just made.  

Now get your almost cooked eggplant slices and add about two spoons of the mixture.

Spread it evenly through the slice and then roll it up.

Spread about 1/4 of a cup marinara sauce on the bottom of a baking dish.  I used a 13x9 inch dish. 

Add your rolled up eggplants onto the baking dish.  Top  off the remaining marinara sauce and cheese onto the rollatinis and bake for about 60 mins, still at 400 degrees.

Let it cool for about 5-10 minutes and serve with roman cheese if desired!
Grab a bottle of vino, a baguette, and some of the parsley dipping oil I know you made ;) [[Get the recipe here!]]
Check back tomorrow for some Christmas Friday Favorites!
ps, don't forget to =)

Tuesday, November 26, 2013

What's to Eat?? Homemade Mac 'n Cheese

Good 'ol Southern Comfort Food

Being raised in the South, you learn a lot about comfort food.  Comfort food is essentially greasy, fatty, buttery, creamy, yummy goodness all loved by your taste-buds, knowing it isn't the healthiest, but oh-so comforting. Who doesn't love mac 'n cheese?! Now, I'm not talking about the Kraft or Easy Mac versions where you pop it in the microwave with some water and powdered cheese and call it a meal; I'm talking about the real Mac n' Cheese, the one where you shred the cheese yourself, actually boil the pasta, and top it off with some breadcrumbs, aka, THE GOOD STUFF.  Today, you will learn how to make this cheesy, delicious recipe; you can even bring it with you to a Potluck or Thanksgiving feast! 

What you will need:: (to make 1 casserole dish worth)
  • 2 8-oz blocks of cheese:: I used one sharp cheddar and one extra sharp cheddar
  • Elbows or pasta of your choice
  • 4 oz cream cheese
  • 3 cups milk(the heavier/fatter, the better)
  • 4 tablespoons of butter
  • 2 1/2 tablespoons of flour
  • Breadcrumbs to sprinkle (I used a blend between Panco and regular breadcrumbs)
  • Garlic Salt/Pepper to taste
Start by turning your oven on to 375 degrees.  
Shred both blocks of your cheese, cover, and then keep refrigerated until you need it. 

Add about half a box of your desired pasta and cook the pasta to a la dente.  Once boiled, keep to side.  Get another pot and add in your butter until melted.  Then add the flour and mix well.  You can add the garlic salt and pepper to taste now. 
Then add the cream cheese and milk and mix well.

You can now get your cheese from the fridge and add all of it in the pot.  Stir in well.

And now add your boiled pasta into the mixture.

Spray your casserole dish with Pam or a non-stick spray and then pour your creamy, cheesy, gooey Mac 'n Cheese into the dish.  

Sprinkle it off with breadcrumbs and gently put it in the oven for about 20-25 minutes. The trick is that you want your macaroni to be a nice golden color and bubbly.  Keep checking the pasta every 10 minutes for this.  Take it out and serve! You can easily warm up the leftovers another day for a stuffing snack or lunch later!

This recipe is BEYOND easy for anyone! Very little effort creates great results! Try it out for yourself!
Check back later this week!
Comment below your thoughts and success and also to subscribe to this blog for future posts!
ps, don't forget to =)

Thursday, November 14, 2013

What's to Eat?? Falafels!

Lentil Falafels!!!

There are many variations of making these protein-filled, little small bundles of joy called falafels-using chickpea variations or lentils.  Personally, falafels are one of my most FAVORITE meals-whether it's in a bowl, pita,  salad, or simply by themselves with a dip.  This Mediterranean dish is so really healthy, filled with flavor, and surprisingly for it's size, super filling, but in a good way, not food-coma status.  

What you will need:: (To make approximately 30-40 small falafels)

  • 1/2 cup of each lentils(green split peas and yellow split chickpeas)
  • 1/2-1 inch of ginger
  • 1-2 chillies, depending on how spicy you want to make it
Soak the lentils in water for two hours.   Then drain the water out and pull out your food processor.

Add the chillies and ginger into the processor and start it until they are both fully chopped.  Then add your lentils and process it until it looks like the picture below. 

 You have just made your falafels!!! THAT SIMPLE.
Now to fry them.  Add a decent amount of oil into your frying pan and turn the heat to medium.  While waiting, you can start on making your falafel balls.  Add salt to taste now.  It is VERY IMPORTANT that you add salt now and only now.  You will notice once you add salt to your falafel mixture, it will make the mixture a lot more watery.  Now just simply take a small amount, or however big you want your falafel balls to be, and create a ball-like shape to it.  I like making smaller ones because I crumble them up in my sandwiches anyways and it makes for more falafels. This process will make your hands veryyyy messy, as you can see below.


You can take a small little bit from your falafel and test the oil to see if its warm and ready to fry.  Once it is, add a handful of your falafels into the pan carefully and turn them and wait until they turn a nice brown color.  YOUR FALAFELS ARE NOW READY! WHOOO HOO! aum-nom-nom-nom :)

 As for what to put in your falafels? I like to add a variety of veggies, hot sauces, feta, harissa(which should already be in your fridge spicy lovers! get my recipe here!), and this yogurt mixture made of yogurt, italian dressing, ranch dressing, hot sauce and salt.

I added about 4 spoonfuls of yogurt to a bowl, with 1-1/2 spoons of italian and ranch dressing.  Then salt to taste and a few pinches of hot sauce to taste.  Everything is really to taste, so just figure out how you would want your nice, cool, yogurt mixture to be.


Don't forget to chop up your veggies and lettuce! (I used romaine lettuce, celery, cabbage, bell peppers, onions, carrots, broccoli, and cucumbers.)

ENJOY!!!!

Check back tomorrow for Friday Favorites and this weekend for an OOTD! 
ps, don't forget to =)

Tuesday, November 5, 2013

What's to Eat?? Spaghetti Squash

Want a comforting, noodle-like dish without feeling the guilt? Pasta-junkie like me but hate the carbs associated with it? Trying to east healthier but can't give up the foods you like most? I have a solution for you to get the best of both worlds!

 Spaghetti Squash alone is just about 31 calories per cup. WHAT?! Bet your mind is blown away, right? I am a vegetarian but have been a bad one when it comes to actually liking vegetables like zucchini, squash, broccoli, brussels sprouts, etc, (yuck, right!?) But I've been liking them a lot more ever since I've been finding new ways to eat them. Squash was on the list of veggies I don't like, YET, I LOVE spaghetti squash, and THAT is saying something! It is a must try; I am sure once you give it one try, you will skip your pastas and use squash instead. Delicious and Nutritious! 

What you will need:: (to make for about 4-5 people)
Spaghetti part::
Squash
Fork
Oven
A sauce (or two like we did) of your favorite liking
My Sauce Recipes::
(For the mac and cheese sauce)
1/4 cup flour
2 cups milk
1/4 cup parmesan cheese, grated
1 tablespoon butter
1/2 cup chopped Broccoli
1/2 of an onion, diced
3/4 bell pepper, chopped
3-4 garlic cloves, diced
salt, pepper, seasonings to taste
Oil, only enough needed for the garlic and onions
(For the marinara sauce)
1/2 marinara sauce of your liking
1 bell pepper, chopped
1 onion, chopped
3-4 garlic cloves, diced
seasonings to taste


Steps for making the actual Spaghetti::
Preheat your oven to 375.
Now, get your squash and start poking holes all throughout it.  This is needed so when you put it in the oven, it would burst. You can now add it into the oven for about an hour.

During this time you can go ahead and make your sauce(s). This was my first time having this style of spaghetti, so I decided to try it two different ways to see how I liked it.
Sauce Recipes::
To make a mac-and-cheese type sauce::
Heat butter and oil in a saucepan over medium heat.  Add your onions and cook for about 2 minutes or when it turns pale pink. Mix in all the veggies now and then stir in the flour. Reduce the heat to low and cook, stirring continuously for about 3-4 minutes.
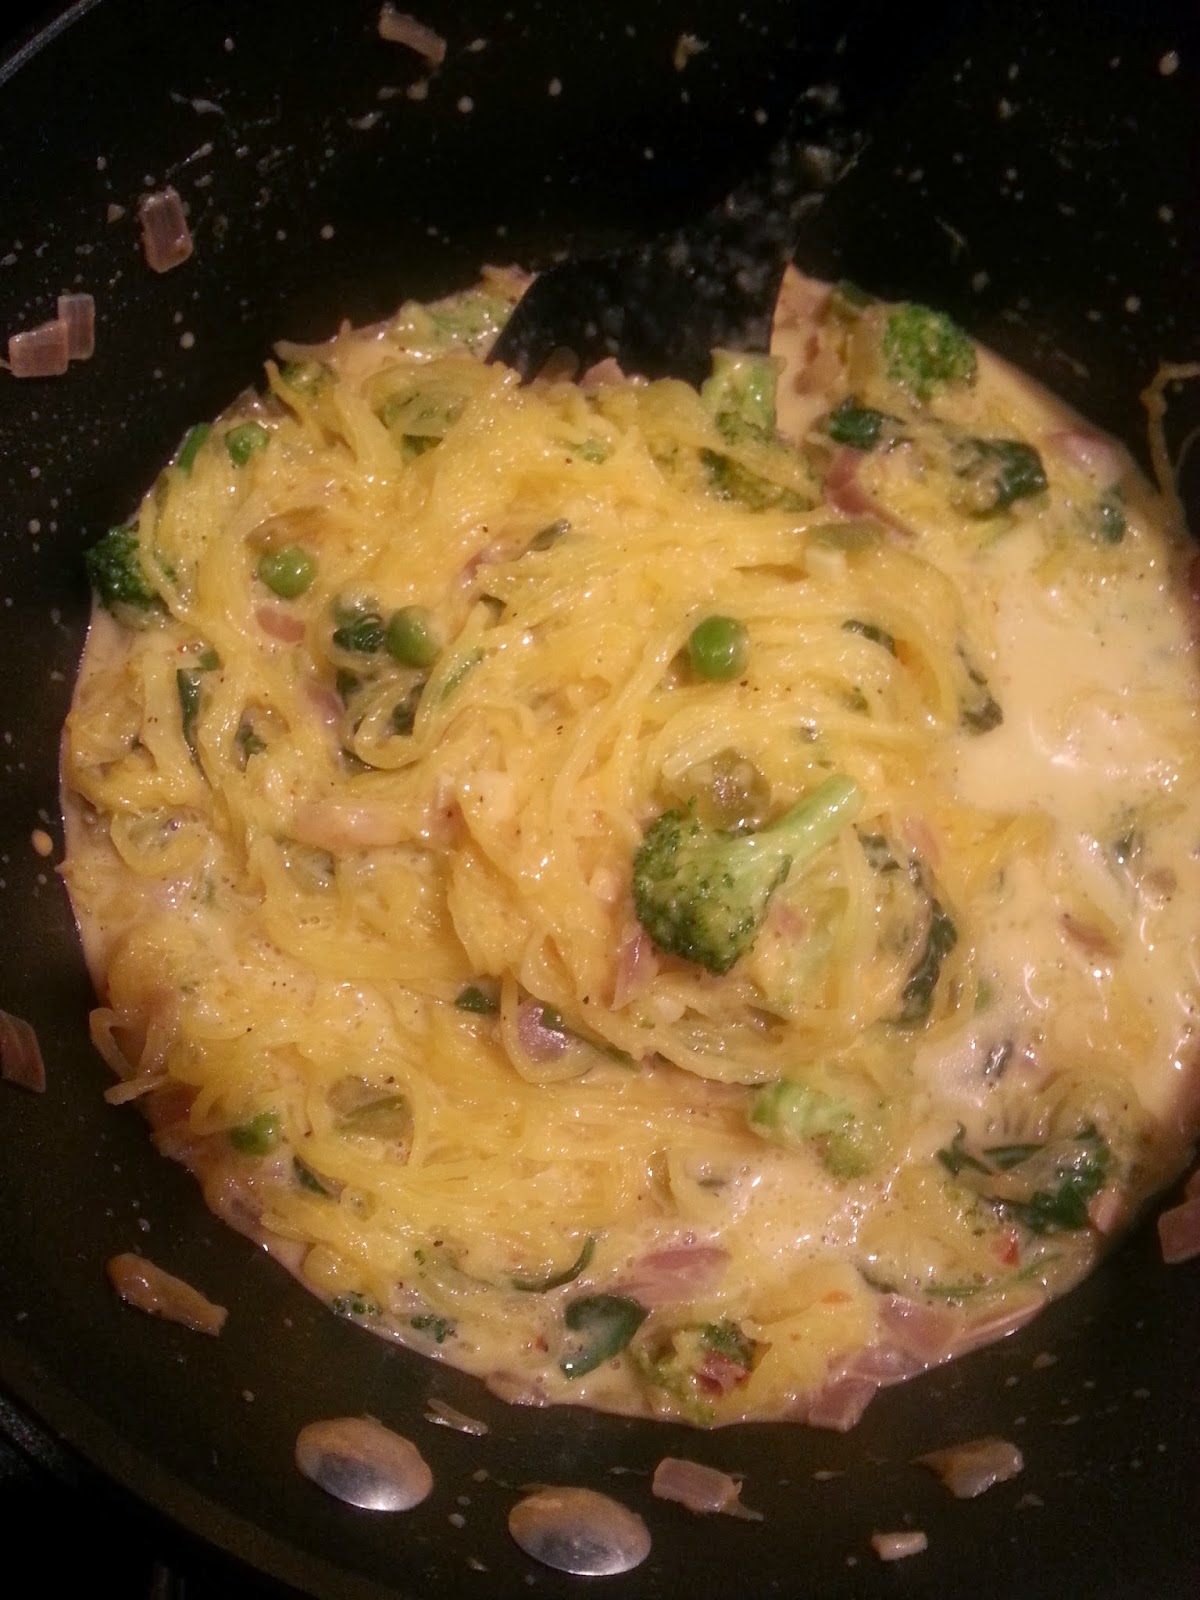
You can now add your milk.  Continue whisking and stirring, raising the heat back up to medium-high until it becomes to a boil and a nice smooth, thick layer. You can add in your spinach and cheese now as well.  Season with salt and pepper to taste.


To make a marinara-base sauce::
Start by adding oil and your garlic into the saucepan, heating it up for about 1-2 minutes.  Then add your onions for a minute, and then your bell peppers.
Add your spinach and mix around until it wilts.
You can now add 1/2 jar of marinara sauce of your liking.
Add salt, pepper, red flakes, and other seasonings to taste.


 Now, back to the Squash!
Cut your squash in half and de-seed your squash.

 Then start forking your squash.  You will see how easy it is forking and the squash becoming string/noodle-like.


THAT IS IT! Just add the spaghetti squash into your sauces, and voila! A healthy, guilt-free, amazing tasting new way to pasta!


The best part to spaghetti squash is that is it truly so simple to make and you can add ANY sauce base to it. Voila, you are ready to indulge in some guilt-free, healthy alternative to pasta! You can put it in the fridge and simply warm it up later for a great meal for another time!
Enjoy!


ps, don't forget to =)

Thursday, October 3, 2013

What's to Eat?? Taco Seasoning

How to make your own Taco Seasoning Mix

Why make your own taco seasoning mix you may ask? I personally think adding a few more minutes of your time to create something of your own, especially since you can see what goes into it, always means more and is always that much better.  My fail proof black beans recipe  and also black bean burger recipe requires for a taco seasoning mixed into the beans.  Taco seasoning is a blend of different seasonings certain to turn ordinary food into a fiesta of flavor.  Perfect for anything Mexican or even for a nice flavorful taste!


What you will need::
  • 1 and 3/4 cups, 2 tablespoons of chili powder
  • 2 tablespoons, 1 and 1/2 teaspoons of garlic powder
  • 2 tablespoons, 1 and 1/2 teaspoons of onion powder
  • 2 tablespoons, 1 and 1/2 teaspoons of crushed red pepper flakes
  • 2 tablespoons, 1 and 1/2 teaspoons dried oregano
  • 1/4 cup, 1 tablespoon paprika
  • 3/4 cup, 3 tablespoons ground cumin
  • 1/2 cup, 2 tablespoons sea salt(or regular salt)
  • 1/2 cup, 2 tablespoons black pepper
Get a large bowl and mix these ingredients really well.
It really is as simple as that.  This will make for a large mix of taco seasoning and can be stored for months in our pantry until needed!
Try it out with the recipes linked above! How do you like it over store bought seasoning?
Check back tomorrow for some fall favorites!
ps, don't forget to =)


Thursday, September 19, 2013

What's to Eat?? Fail-Proof Black Beans


Chipotle style/Mexican style/Everyday style Black Beans

If you want to make black beans, you would just normally take a can of black beans, rinse, and cook it over the stove for a few minutes and your probably done, right? Is this the absolute quickest way? Sure. Is it filled with mouth-watering, spices-filled, extra veggie lovin', fresh black beans? NO WAY! Add just a few more minutes of your time and you can have fresh black beans for you and anyone else! You can even make a bunch in one cooking and freeze half for a later use! GENIUS. ((NOTE:: This recipe calls for an overnight step.))


What you will need::
  • A bag of dry black beans (I use Goya)
  • Olive oil- 1-2 tablespoons
  • 1 onion-chopped
  • 1 green pepper-chopped
  • 4 garlic cloves-diced
  • Taco seasoning-2 spoons
  • 2 Bay leaves
  • Salt-to taste
I come from a big family and also friends are always in and out.  So I usually use this 4lb bag of Goya dry black beans.  Also, you can always make it and then put it away in the freezer for up to 3-4 months and take it out and warm it up whenever you want.  So it's safe to say, the more you make, it will always be for the better.

Usually, the night before, you want to dump your black beans into a bowl big enough to hold it and immerse it in water and let it sit overnight.  *SIDE TIP* They say that if you boil black beans straight out of the bag, or can, you lose alot of the nutrients,  That is why I prefer to let it soak overnight.

The next day, thoroughly rinse you black beans, like shown below.

You can now start cutting up your yummy and healthy veggies that add a great taste to your black beans.  I like to use 4 cloves of garlic-diced, and 1 onion and green pepper chopped up.

**Here's my rule of thumb about olive oil and trying to be healthy.** You want to use just enough for your food but not any bit more.  In this case, you want enough oil for you onions and garlic to cook.  After you add your oil and let it heat up, add your garlics.  After a minute or so, add your onions. Notice how in the picture below, you can see the onion still have its pink color.

Now notice how in the picture below, the onion's color is almost translucent. THIS is what you want.  For all the flavor to be emerged.  Now add your bell peppers and wait until they've become translucent. 


Add 2 spoonfuls of a  taco seasoning mix and 2 bay leaves for an added taste.  If you want more of a Chipotle-style black bean, then just add 2 spoons.  If you want more of the spices, add 3.  Chipotle doesn't have alot of the spice flavoring in their black beans.

Now add your black beans and enough water to cover  the black beans with an extra inch or two of water. 
Keep it on low and it will take about 4 hours before it is ready. (This method makes for a better taste and most nutritious.)
If you keep it on medium-high, it will take about 2-3 hours.(This method is for if you are in  more of a hurry.)
Try the black beans every 30 minutes for good texture as you would like.  I like it soft but not mushy.  If you want a thicker-mushy paste, use a masher or immersion bender to mash it up.

I paired the black beans this time with an enchilada, rice, and some tortilla chips! What will you use yours with??

Thanks for checking! This simple recipe will leave your friends and family drooling back for more!
Check back tomorrow for some sorority-loving crafts and my Friday Favorites!
ps, don't forget to =)